Working with the Graph
The graph is usually larger than can fit in the window. As soon as the graph does not fit, an overview pane is visible in the lower right corner. Within the overview pane, the active graph area is presented as a blue rectangle. To select the part of the graph that should be visible, click and hold down the left mouse button on the graph window and move the graph area with the mouse. The active area rectangle within the overview pane can also be moved by holding down the left mouse button.
Zooming can be performed with the mouse-wheel, or by selecting the zoom factor in the toolbar. As soon as a the zoom factor is less than 100%, an interactive magnifier will be activated (either a magnifying glass or a “balloon magnifier”).

Instance and Reference Info Window
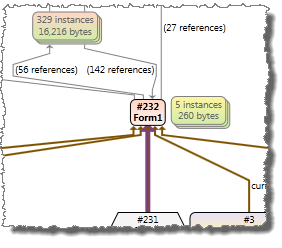
When the mouse is moved over a graph element, (i.e. an instance, root, or reference), a blue arrow button  will appear. Hovering with the mouse over the button or clicking the button will bring up the info window.

The info window will present information about the element. The actual information presented depends on the type of the element. For example, for a single instance element includes a subset of the information presented in the Type instance details view, e.g. analysis issues, the allocation call stack, and field information. In addition information about the
The info window also provides access to commands related to the element, such as Show instance details and Highlight root path. For elements that represent combined instances or roots, a set of Expand commands are also included.
The commands in the info window are also available on the right-click context menu. For more information about the available commands, see Instance Graph Commands.
Defining Items to Include
The set of instances and references related to a selected instance can be rather significant, and analyzing higher level non-shortest root paths and hot references can be very time consuming. To improve the performance and to reduce clutter, it is possible to define the level of information to present in the graph. By default, shortest-root paths and non-shortest root paths up to level two are presented, as well as instances held by the selected instance. The include menu  can be used to select the non-shortest root path level to include, and whether other related instances that are not part of the root paths should be included. Related instances that are not part of any root path, i.e. the other reachable instances, other referrer instances, and held instances, are always combined to reduce the graph size.
Note that a single instance can be classified as more than one type, e.g. a reachable instance can also be a root path instance. Root path instances always have precedence over other related instances, so if an instance is both a root path instance and a reachable instance, it will be presented together with the other root paths instances, and possibly combined with other root path instances. It will not be combined with the other reachable instances.
If related instances like other reachable instances and other referrer instances are included, the number of references between them and other root path instances can become significant. Including all these references in the graph can make the graph harder to follow. Therefore it is possible to reduce the number of included edges by using the command Reduce edges. If edges are reduced, less important reference edges are not included in the graph. However, this can also cause instance nodes to become disconnected (see screenshot below).
Investigating Root-paths in a Large Graph
In a large instance graph, it can be hard to locate specific root paths. In this case the Highlight root path or Align root path commands are useful. These commands are available from the popup window of each instance, root, and reference in the graph, as well as from the right click menu. When selected, it will find the shortest root path that passes through the instance, root, or reference, highlight the root path. If Align root path is used, the root path instances will be aligned vertically as well. Root paths can also be selected using the navigation buttons that are provided on the sides of the graph.