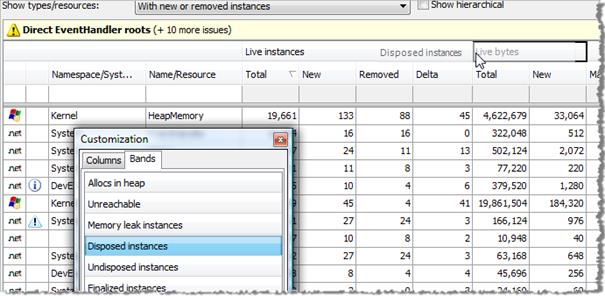
Column Layout and Customization
For most of the tables used in the profiler, it is possible to customize the layout and choose the columns that should be included (all columns are not included by default).
The customization is accessed by using the commands in the View->Layout menu or by using the context menu for the column headers. The available commands are described below.
Some customization can also be performed by using the mouse directly on the columns. It is possible to change the size of the column, rearrange the order of the columns, or remove a column by using drag and drop on the column headers. Sorting is defined by clicking the column headers; to sort on multiple columns the Shift or Ctrl key can be used.
Column Chooser
This command brings up the column Customization window. Using this window it is possible to drag and drop columns (and bands) to and from the column header.

It is also possible to remove columns by simply dragging them away from the column header.
Auto-adjust Column Widths
This command toggles whether the column widths should be adjusted to fit the table width exactly, or if the columns can be sized freely. If the columns widths are not automatically adjusted, a horizontal scroll bar will be included when necessary, and the most important columns will be pinned to the left side of the table.
Reset layout
This command can be used to restore the layout to the default layout defined in the .NET Memory Profiler installation. This will affect all column layouts, and the positioning of tool windows like the Project explorer.